Recipes

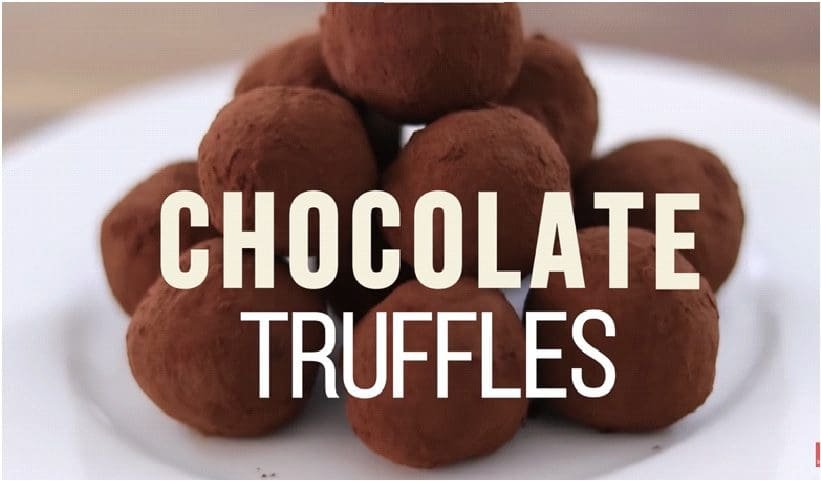
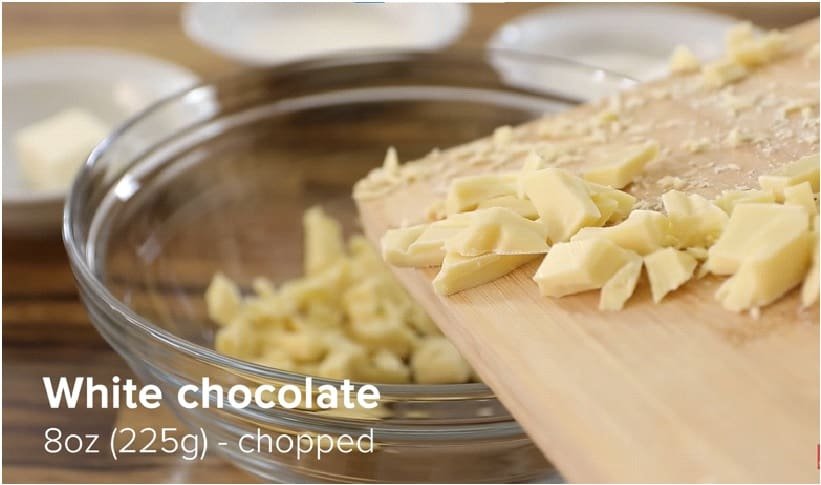
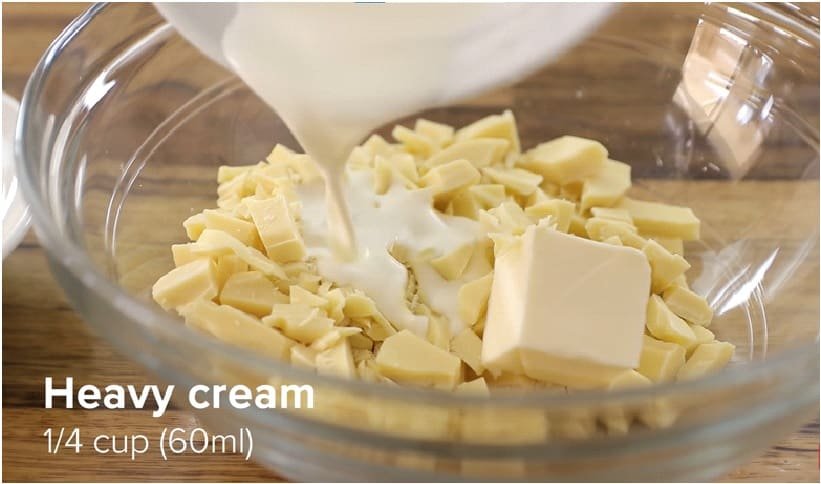
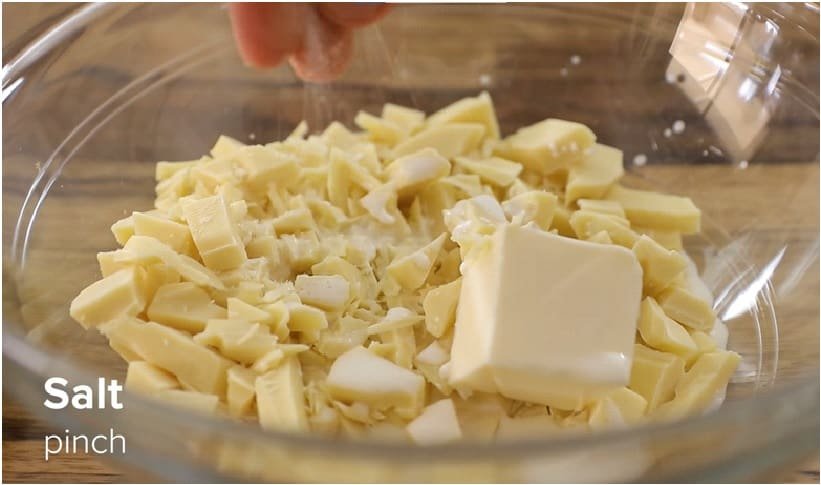
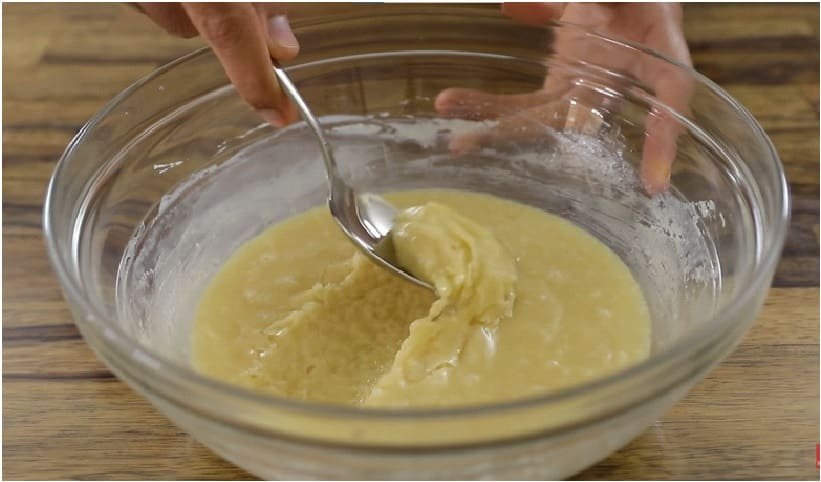
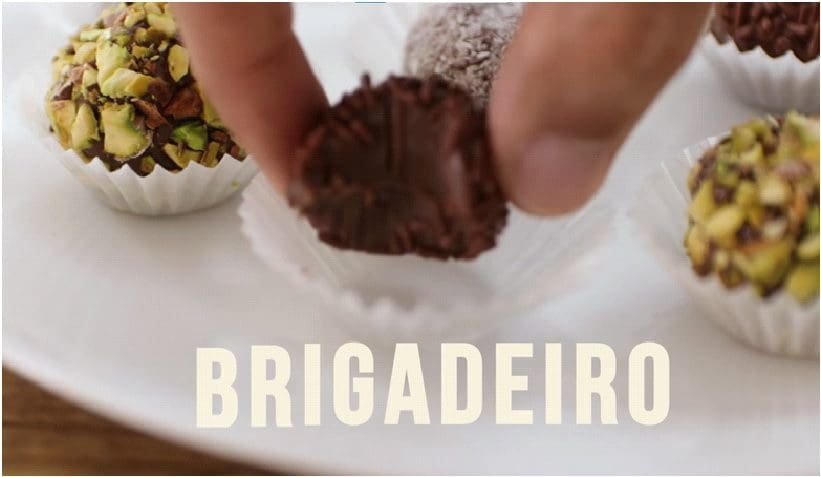
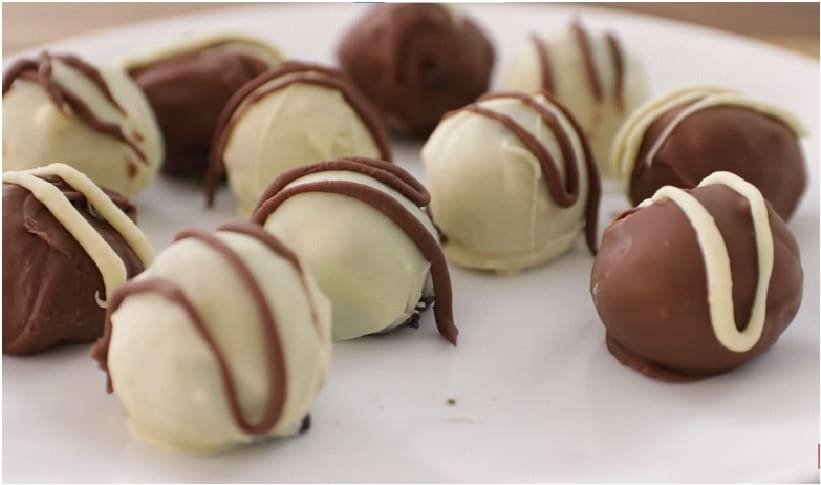
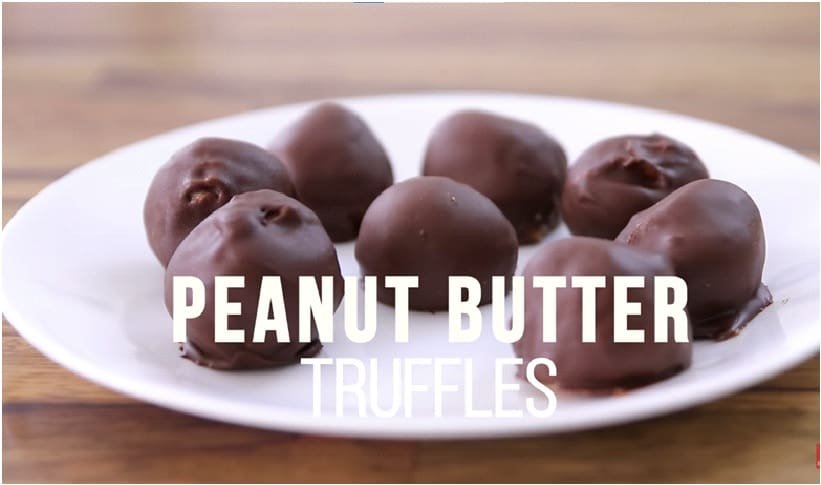
Chocolate Truffles Recipe : 8 Easy Chocolate Recipes for Melt-in-Your-Mouth Delights 

Chocolate Truffle Easy Recipes

" Forget bland chocolates and overcomplicated desserts. We're diving into a decadent realm of 8 Easy Truffle Recipes that will tantalize your taste buds and impress your guests, all without breaking a sweat. No tempering meltdowns, no fancy molds, just pure, unadulterated truffle joy at your fingertips."

Truffle Bliss: 8 Easy Recipes for Melt-in-Your-Mouth Delights

Chocolate Truffles

Ingredients:

  • 8 ounces (225g) Dark Chocolate, chopped
  • 1/2 cup (120ml) Heavy Cream
  • 1 teaspoon Vanilla Extract
  • Cocoa Powder (for rolling)

Instructions:

  1. Prepare the Ingredients:
    • Measure and chop 8 ounces (225g) of dark chocolate.
    • Measure 1/2 cup (120ml) of heavy cream.
    • Prepare 1 teaspoon of vanilla extract.
    • Ensure you have cocoa powder for rolling.
  2. Heat the Heavy Cream:
    • In a saucepan, heat the heavy cream over medium heat until it simmers. Do not let it boil; just bring it to a gentle simmer.
  3. Combine Cream and Chocolate:
    • Place the chopped dark chocolate in a heatproof bowl.
    • Pour the hot cream over the chopped chocolate, ensuring all chocolate is covered.
    • Allow it to sit undisturbed for 2-3 minutes. This time allows the hot cream to melt the chocolate.
  4. Add Vanilla and Stir:
    • After 2-3 minutes, add 1 teaspoon of vanilla extract to the chocolate and cream mixture.
    • Gently stir the ingredients until the chocolate is completely melted, and the mixture becomes smooth and glossy.
  5. Refrigerate the Mixture:
    • Cover the bowl with plastic wrap or a lid and refrigerate the chocolate mixture for at least 1 hour or until it's firm and set.
  6. Forming the Truffle Centers:
    • Once the chocolate mixture is firm, take a small portion of it and roll it between your palms to form a small ball. The size can be adjusted according to your preference.
  7. Chill Again:
    • Place the formed truffle balls on a tray or plate and refrigerate them for an additional 20-30 minutes. This step helps the truffles hold their shape.
  8. Final Rolling and Coating:
    • After the second chilling, take the truffles out of the refrigerator.
    • Roll each truffle between your palms again to create smooth, evenly shaped balls.
    • Roll the truffles in cocoa powder, ensuring they are completely coated.
  9. Serve or Store:
    • Your chocolate truffles are now ready to be served or stored. Place them in an airtight container and keep them refrigerated until ready to enjoy.
  10. Optional Decorations:
    • If desired, you can get creative with decorations. Consider rolling the truffles in chopped nuts, powdered sugar, or drizzling them with melted chocolate for an extra touch.
Truffle Bliss: 8 Easy Recipes for Melt-in-Your-Mouth Delights

truffles with white chocolate

Ingredients:

  • 8 ounces (225g) White Chocolate, chopped
  • 1 1/2 tablespoons (23g) Butter
  • 1/4 cup (60ml) Heavy Cream
  • 1 pinch of Salt
  • 1/2 teaspoon Vanilla Extract
  • 1/3 cup (33g) Shredded Coconut (for rolling)

Instructions:

  1. Prepare the Ingredients:
    • Measure and chop 8 ounces (225g) of white chocolate.
    • Measure 1 1/2 tablespoons (23g) of butter.
    • Measure 1/4 cup (60ml) of heavy cream.
    • Prepare a pinch of salt.
    • Measure 1/2 teaspoon of vanilla extract.
    • Ensure you have 1/3 cup (33g) of shredded coconut for rolling.
  2. Melt White Chocolate and Butter:
    • Place the chopped white chocolate and butter in a heatproof bowl.
    • Set the bowl over a saucepan of simmering water, creating a double boiler.
    • Stir occasionally until the white chocolate and butter are completely melted and smooth.
  3. Add Cream, Salt, and Vanilla:
    • Once the white chocolate and butter are melted, add 1/4 cup of heavy cream to the mixture.
    • Sprinkle in a pinch of salt for flavor.
    • Add 1/2 teaspoon of vanilla extract.
    • Mix the ingredients until well combined, creating a creamy and smooth consistency.
  4. Refrigerate the Mixture:
    • Cover the bowl with plastic wrap or a lid and refrigerate the white chocolate mixture for at least 2 hours. This chilling period allows the mixture to firm up.
  5. Forming Truffle Centers:
    • After the mixture has chilled and become firm, take it out of the refrigerator.
    • Using your hands, scoop small portions of the mixture and roll them between your palms to form small, round truffle centers.
  6. Prepare Shredded Coconut:
    • Place the shredded coconut in a shallow bowl or plate. This will be used to coat the truffles.
  7. Roll Truffles in Shredded Coconut:
    • Take each truffle center and roll it in the shredded coconut until it's completely coated. Press gently to adhere the coconut to the truffle.
  8. Final Chilling (Optional):
    • If desired, you can refrigerate the coated truffles for an additional 30 minutes to ensure they are firm and hold their shape.
  9. Serve or Store:
    • Your white chocolate truffles are now ready to be served or stored. Place them in an airtight container and keep them refrigerated until ready to enjoy.
  10. Optional Decorations:
    • For extra flair, you can drizzle melted white chocolate over the truffles or roll them in additional coconut before serving.
Truffle Bliss: 8 Easy Recipes for Melt-in-Your-Mouth Delights

tiramisu truffles

Ingredients:

  • 1 cup + 1 tablespoon (250g) Mascarpone Cheese
  • 1/3 cup + 1 teaspoon (50g) Powdered Sugar
  • 30ml Cold Coffee
  • 1/2 teaspoon Vanilla Extract
  • 5 ounces (140g) Ladyfinger Cookies
  • Cocoa Powder (for rolling)

Instructions:

  1. Mixing Mascarpone and Sugar:
    • In a mixing bowl, combine the mascarpone cheese and powdered sugar.
    • Stir or whisk until the mixture becomes smooth and homogeneous.
  2. Adding Coffee and Vanilla:
    • Pour in the cold coffee and add the vanilla extract to the mascarpone mixture.
    • Continue mixing until the ingredients are well incorporated, resulting in a creamy consistency.
  3. Processing Ladyfinger Cookies:
    • Take the ladyfinger cookies and process them into small crumbs. This can be done using a food processor or by placing them in a sealed plastic bag and crushing them with a rolling pin.
    • Combine the ladyfinger crumbs with the mascarpone mixture. Gently fold them together until the cookies are evenly distributed throughout the mixture.
  4. Freezing the Mixture:
    • Place the combined mixture in the freezer for approximately 30 minutes. This step is crucial for firming up the mixture, making it easier to shape into truffles.
  5. Shaping Options:
    • Option 1 - Forming Balls:
      • After the mixture has firmed up, take it out of the freezer. Scoop out small portions and roll them between your palms to form smooth, round truffle balls.
    • Option 2 - Filling with Nutella (Optional):
      • As an alternative, you can flatten a portion of the mixture in your hand, place a small amount of Nutella in the center, and encase it within the mixture, forming a filled truffle.
  1. Rolling in Cocoa Powder:
    • Prepare a plate or shallow bowl with a layer of cocoa powder.
    • Gently roll each shaped truffle in the cocoa powder until it is evenly coated. This adds a delightful cocoa dusting to the exterior of the truffles.
  2. Final Touch:
    • Once all truffles are shaped and coated, transfer them to a serving plate or a storage container.
    • If desired, you can refrigerate the truffles for a short while to allow them to set further before serving.
  3. Enjoy:
    • Serve and enjoy these delectable tiramisu truffles with their rich coffee and mascarpone flavors complemented by the cocoa coating. Perfect for indulging in a bite-sized taste of classic tiramisu.
Truffle Bliss: 8 Easy Recipes for Melt-in-Your-Mouth Delights

brigadeiro recipe

Ingredients:

  • 1 tablespoon (15g) Butter
  • 1 can (14 ounces/397g) Sweetened Condensed Milk
  • 1/4 cup (30g) Cocoa Powder
  • Desiccated Coconut, Chocolate Chips, Crushed Pistachios (for coating)

Instructions:

  1. Prepare Ingredients:
    • Measure 1 tablespoon of butter.
    • Open a can of sweetened condensed milk (14 ounces/397g).
    • Measure 1/4 cup (30g) of cocoa powder.
    • Prepare desiccated coconut, chocolate chips, and crushed pistachios for coating.
  2. Melt Butter and Combine Ingredients:
    • In a saucepan, melt the butter over low heat.
    • Add the sweetened condensed milk and cocoa powder to the melted butter.
    • Stir the mixture continuously to ensure the ingredients are well combined.
  3. Cook the Mixture:
    • Continue to cook the mixture over low heat, stirring constantly to prevent burning.
    • Cook for approximately 6-8 minutes or until the mixture thickens. It should reach a fudgy consistency.
  4. Pour and Cool:
    • Once thickened, pour the brigadeiro mixture onto a greased plate or into a greased mold.
    • Allow the mixture to cool for at least 1 hour. This cooling time is essential for the brigadeiro to set and become easy to handle.
  5. Form Small Balls:
    • Grease your hands with a small amount of butter. This will prevent the mixture from sticking to your hands.
    • Take small portions of the cooled brigadeiro mixture and roll them between your palms to form small, bite-sized balls. The size can vary based on your preference.
  6. Coat with Toppings:
    • Prepare a variety of coatings such as desiccated coconut, chocolate chips, and crushed pistachios.
    • Roll each brigadeiro ball in your chosen coating until it is evenly covered. You can mix and match coatings or choose a single one for a uniform look.
  7. Serve or Store:
    • Once coated, place the brigadeiros on a serving platter or in small paper cups.
    • They are now ready to be served, or you can store them in an airtight container. Brigadeiros can be stored at room temperature for a few days or refrigerated for a longer shelf life.
  8. Enjoy:
    • Share these delicious brigadeiros with family and friends or indulge in them as a delightful treat. The combination of the fudgy chocolate center and the various coatings adds a delightful texture and flavor to each bite.
Truffle Bliss: 8 Easy Recipes for Melt-in-Your-Mouth Delights

Oreo Truffles

Ingredients:

  • 24 Oreo Cookies
  • 3/4 cup (170g) Cream Cheese
  • White Chocolate and Dark Chocolate (for coating)

Instructions:

  1. Crushing the Oreos:
    • Start by separating the Oreo cookies and removing the cream filling. You can use a food processor or place the cookies in a sealed plastic bag and crush them using a rolling pin until you achieve fine crumbs. The goal is to have a consistent texture for the truffle mixture.
  2. Mixing with Cream Cheese:
    • In a mixing bowl, combine the finely crushed Oreos with the cream cheese. The cream cheese should be softened to make it easier to mix. Use a spatula or your hands to thoroughly blend the two ingredients until you have a homogenous mixture.
  3. Refrigerating the Mixture:
    • Cover the bowl with plastic wrap and refrigerate the Oreo and cream cheese mixture for at least 30 minutes. Chilling the mixture will make it easier to handle and shape into balls.
  4. Forming Truffle Balls:
    • After the mixture has chilled, take it out of the refrigerator. Using your hands, scoop out small portions and roll them into bite-sized balls. Ensure that the balls are evenly sized for a consistent final result.
  5. Refrigerating Again:
    • Place the formed truffle balls on a parchment-lined tray and refrigerate for an additional 30 minutes. This step helps the truffles to set and hold their shape when dipped in chocolate.
  6. Dipping in Chocolate:
    • Melt the white and dark chocolate in separate bowls. You can use a microwave or a double boiler for this. Dip each truffle ball into the melted chocolate of your choice, ensuring it is fully coated. Use a fork to lift the truffle out of the chocolate, allowing any excess to drip off.
  7. Optional Chocolate Drizzle:
    • For an extra decorative touch, drizzle additional melted chocolate (either white or dark) over the dipped truffles. You can use a spoon or a piping bag to create a decorative pattern. This step adds both visual appeal and a layer of delicious chocolate flavor.
  8. Setting the Truffles:
    • Place the chocolate-coated truffles back on the parchment-lined tray. Allow them to set completely in the refrigerator. This will ensure that the chocolate hardens, creating a shell around each truffle.
  9. Serve and Enjoy:
    • Once the chocolate coating is firm, your Oreo truffles are ready to be enjoyed. Serve them at room temperature for the best flavor and texture. Store any leftovers in an airtight container in the refrigerator.
Truffle Bliss: 8 Easy Recipes for Melt-in-Your-Mouth Delights

Peanut Butter Truffles

Ingredients:

  • 1 cup (250g) Smooth Peanut Butter
  • 6 tablespoons (90g) Softened Butter
  • 1 teaspoon Vanilla Extract
  • 1 3/4 cups (220g) Powdered Sugar
  • Chocolate (for coating)

Instructions:

  1. Prepare the Peanut Butter Mixture:
    • In a large mixing bowl, measure out 1 cup of smooth peanut butter.
    • Add 6 tablespoons of softened butter to the peanut butter.
    • Pour in 1 teaspoon of vanilla extract to enhance the flavor.
    • Using an electric mixer or a sturdy spoon, beat the peanut butter, softened butter, and vanilla until the mixture is smooth and well combined. This step ensures a creamy and evenly flavored base for the truffles.
  2. Incorporate Powdered Sugar:
    • Gradually add 1 3/4 cups of powdered sugar to the peanut butter mixture.
    • Continuously beat the mixture as you add the powdered sugar to prevent lumps and ensure a consistent texture.
    • Beat until all the ingredients are fully combined and the mixture becomes smooth. This process may take a few minutes, and the result should be a thick, dough-like consistency.
  3. Refrigerate the Mixture:
    • Cover the bowl with plastic wrap or transfer the peanut butter mixture to an airtight container.
    • Place it in the refrigerator for at least 30 minutes. Chilling the mixture will make it easier to handle and shape into truffle balls.
  4. Forming the Truffle Balls:
    • Once the peanut butter mixture has chilled, take it out of the refrigerator.
    • Scoop out small portions of the mixture and roll them between your palms to form bite-sized balls. Aim for consistency in size to ensure even coating and a pleasing presentation.
  5. Prepare the Chocolate Coating:
    • Melt the desired amount of chocolate for coating. You can use a microwave or a double boiler for this process.
    • Ensure that the chocolate is smooth and free from lumps. You can use dark, milk, or white chocolate based on your preference.
  6. Dipping the Truffles:
    • Take each peanut butter ball and dip it into the melted chocolate, ensuring an even coating on all sides.
    • Use a fork or a dipping tool to lift the coated truffle, allowing any excess chocolate to drip off.
  7. Setting in the Refrigerator:
    • Place the chocolate-coated truffles on a parchment paper-lined tray or plate.
    • Once all truffles are coated, refrigerate them for at least 1 hour to allow the chocolate to set and the truffles to firm up.
  8. Serve and Enjoy:
    • Once the chocolate coating is firm, the Peanut Butter Truffles are ready to be served. They can be enjoyed immediately or stored in the refrigerator for a longer shelf life.
Truffle Bliss: 8 Easy Recipes for Melt-in-Your-Mouth Delights

Nutella Truffles

Ingredients:

  • 1/2 cup (120ml) Heavy Cream
  • 2 tablespoons (30g) Butter
  • 8 ounces (225g) Dark Chocolate
  • 2/3 cup (200g) Nutella
  • Cocoa Powder (for rolling)

Instructions:

  1. Prepare the Ganache:
    • In a small saucepan, melt 2 tablespoons of butter over low heat.
    • Simmer 1/2 cup of heavy cream until it is just about to boil. Avoid boiling it; you want it hot but not scalding.
  2. Combine Ingredients:
    • Pour the hot cream over 8 ounces of chopped dark chocolate. Allow it to sit undisturbed for 1-2 minutes. This step helps in melting the chocolate.
  3. Mixing:
    • After letting it sit, gently stir the chocolate and cream until they are well combined and form a smooth, glossy ganache.
  4. Add Nutella:
    • Once the chocolate and cream are smoothly mixed, add 2/3 cup of Nutella to the ganache. Continue stirring until the Nutella is fully incorporated. This will give your truffle mixture a rich and creamy texture with the distinctive flavor of Nutella.
  5. Refrigerate:
    • Transfer the mixture to a bowl and cover it. Refrigerate for at least 2 hours or until the mixture becomes firm. This chilling process allows the ganache to solidify, making it easier to handle and shape into truffles.
  6. Forming Truffles:
    • After the mixture has set in the refrigerator, take it out and, using a spoon or your hands (lightly dusted with cocoa powder to prevent sticking), form small, bite-sized balls. Roll each portion between your palms to create smooth, round truffles.
  7. Roll in Cocoa Powder:
    • Roll each truffle in cocoa powder until it is evenly coated. The cocoa powder not only adds a delightful finish but also prevents the truffles from sticking together.
  8. Final Touch:
    • Once all truffles are formed and coated, you can place them on a tray or plate lined with parchment paper.
  9. Serve or Store:
    • Serve the Nutella truffles immediately, or store them in an airtight container in the refrigerator until ready to enjoy.


Truffle Bliss: 8 Easy Recipes for Melt-in-Your-Mouth Delights

Red Velvet Truffles

Ingredients:

  • Red Velvet Cake (baked and crumbled)
  • 1 cup (225g) Cream Cheese, softened
  • 16 ounces (450g) White Chocolate (for coating)

Instructions:

  1. Bake the Red Velvet Cake:
    • Preheat your oven according to the cake recipe instructions.
    • Prepare the Red Velvet Cake batter as directed.
    • Grease and flour a cake pan, then pour the batter into the pan.
    • Bake the cake according to the recipe guidelines until a toothpick inserted in the center comes out clean.
    • Allow the cake to cool completely.
  2. Crumble the Red Velvet Cake:
    • Once the Red Velvet Cake has cooled, crumble it into fine crumbs using your hands or a fork.
    • Ensure that there are no large chunks and that the cake is evenly crumbled.
  3. Prepare the Truffle Mixture:
    • In a large mixing bowl, combine the crumbled Red Velvet Cake with the softened cream cheese.
    • Use a spoon or your hands to thoroughly mix the cake crumbs and cream cheese until a uniform, moist mixture is formed.
    • The cream cheese acts as a binder and gives the truffle mixture a smooth consistency.
  4. Form Truffle Balls:
    • Take small portions of the mixture and roll them between your palms to form uniform truffle balls.
    • The size of the truffle balls can be adjusted based on personal preference, but they are typically bite-sized.
  5. Refrigerate:
    • Place the formed truffle balls on a lined baking sheet or plate.
    • Refrigerate the truffle balls for at least 15 minutes. This step helps the truffles firm up, making them easier to handle during the coating process.
  6. Prepare White Chocolate Coating:
    • Melt the white chocolate using a double boiler or in the microwave, stirring at intervals until smooth.
    • Ensure the white chocolate is fully melted and has a smooth consistency for easy dipping.
  7. Dip Truffles in White Chocolate:
    • Using a fork or a dipping tool, carefully dip each chilled truffle into the melted white chocolate.
    • Coat the truffles evenly, allowing any excess chocolate to drip off.
  8. Refrigerate Until Set:
    • Place the coated truffles back onto the lined baking sheet or plate.
    • Refrigerate the truffles until the white chocolate coating is completely set and hardened.
  9. Optional Garnish (if desired):
    • If desired, you can garnish the truffles before the white chocolate sets completely. Consider sprinkling red velvet cake crumbs or drizzling additional melted chocolate on top.

10. Serve and Enjoy:

      • Once the truffles are fully set, transfer them to a serving platter or airtight container.


Leave a Reply