Baking Tips

16 Different ways you can use Stencils on Cake

ways to use cake stencils

In this articale I'm going to explain you 16 ways to use stencils on cakes, using different parts of stencils, placing them in different ways and using different materials with them to create different effects. I'll start with some stencil basics before going on to the different techniques. For stencil designs you'll need a little bit of buttercream just enough to thinly cover the stencil so you don't need much and you'll need an offset spatula, optionally a frosting smoother, and of course your stencil

Acrylic or plastic or homemade with parchment and I'll explain you how to do that later. The consistency of the buttercream is really important - it needs to be easily spreadable, not so stiff that it breaks apart as you spread. The frosting on your cake needs to have set so that the stencil won't damage the frosting and I like to chill my cakes to set the frosting for an hour or two so that it's really firm and will hold its shape even with any pressure you apply to the stencil. The cake should definitely not be frozen. If the cake is too cold or the buttercream consistency is too stiff, the buttercream will peel off with the stencil instead of sticking to the cake.

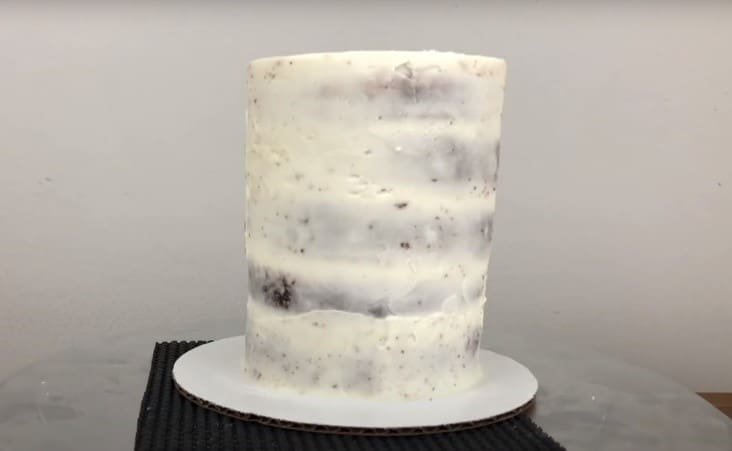
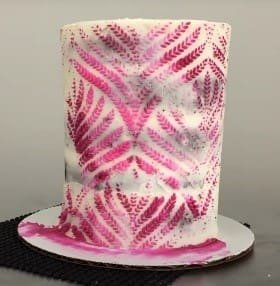
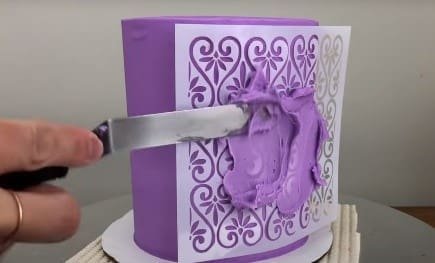
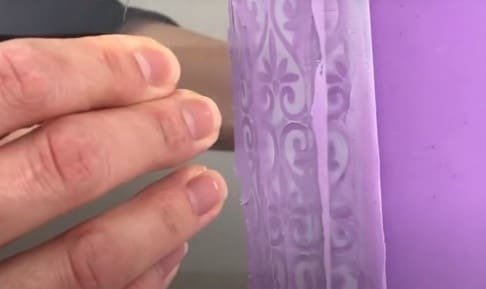
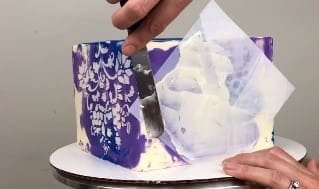
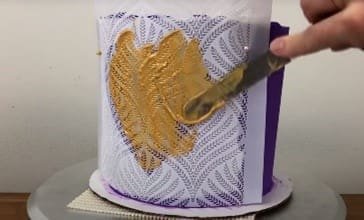
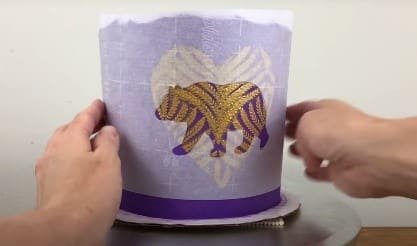
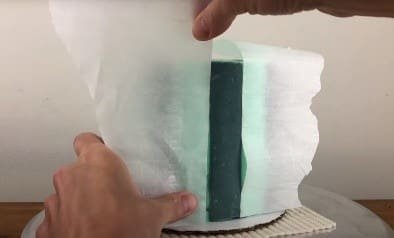
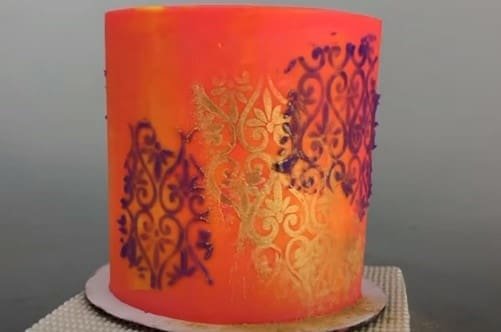
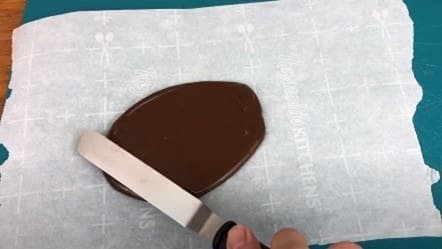
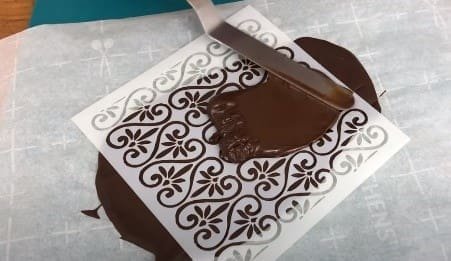
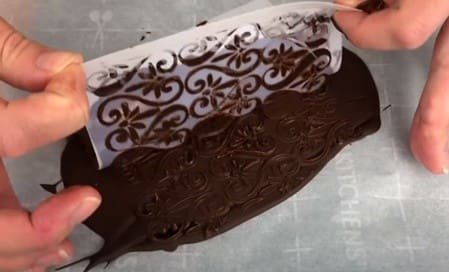
I'm doing this on a very cold cake with just a crumb coat as an example and the consistency of the buttercream is fine but since the cake is so cold and I'm taking a long time to spread the buttercream on, the buttercream is getting cold while it's still on the stencil so part of the buttercream is setting against the stencil instead of the cake and when I peel the stencil off, you can see that although some of the buttercream has gone through the stencil and stuck to the cake, if I flip the stencil around so you can see the back, the side that was pressed against the cake, most of the buttercream pattern is still stuck to the stencil.

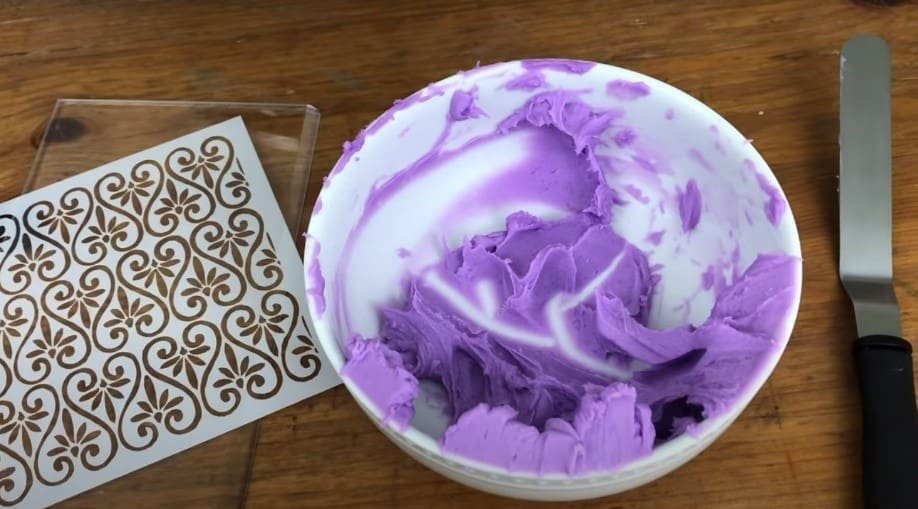
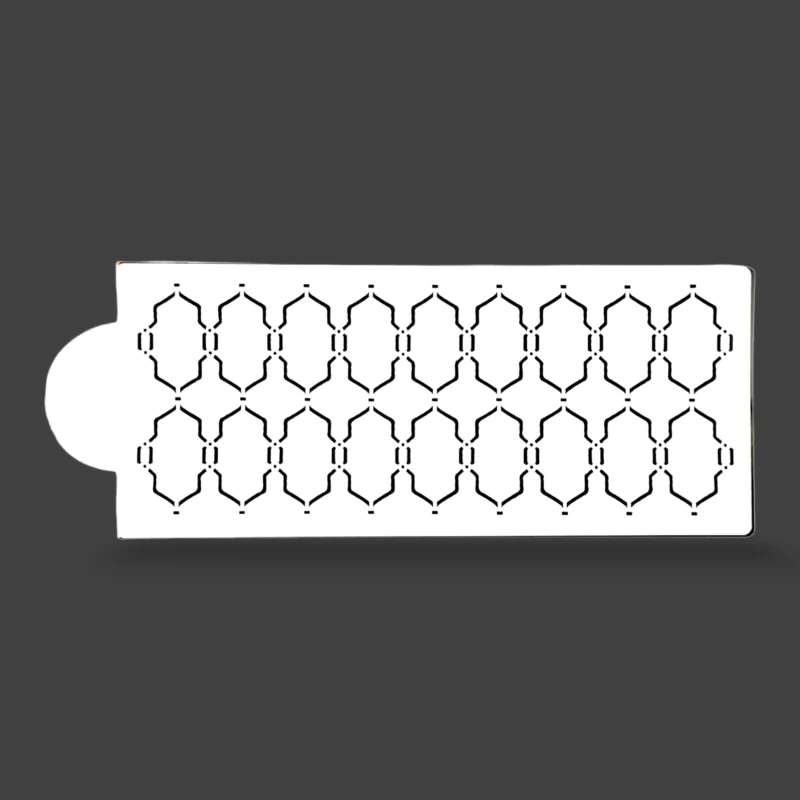
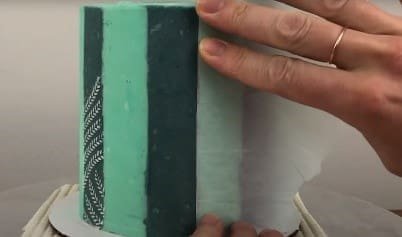
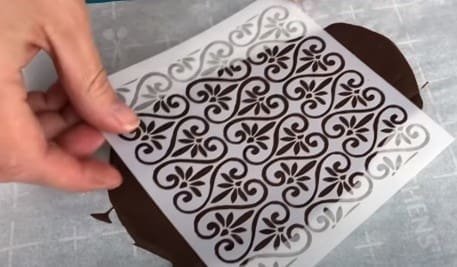
It's important that the stencil stays in the same position while you spread buttercream over it so that it doesn't smudge the design. The stencil might stick to the cake with any condensation on the outside of the frosting, especially if the stencil is made with a very thin plastic like this one.

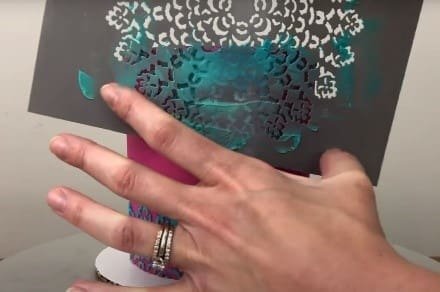
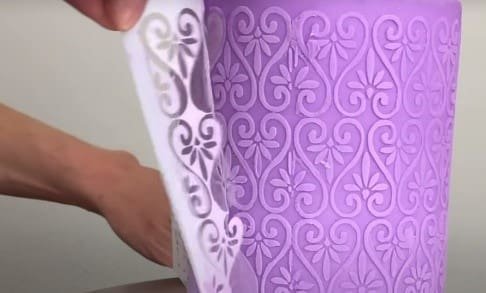
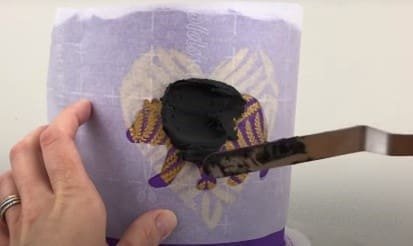
If you've chilled your cake in the fridge to set the frosting and then you're applying the stencil at room temperature, the difference in temperature might cause some tiny beads of condensation to form on the cake and they might be enough to hold the stencil in place but if the condensation isn't enough, you can press the stencil onto your cake with your fingers, making sure not to move your fingers which would move the stencil. This only works if the frosting has set so it's very firm, preferably after an hour or two in the fridge.

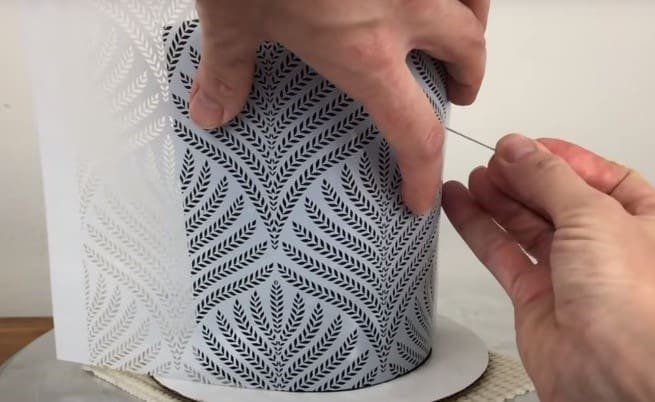
If you press too hard or for too long, the warmth and pressure of your fingers will press into the frosting and leave indents behind after you peel off the stencil. Another option is to use pins, wrapping the stencil tightly around the cake and then pushing the pins through the stencil and into the cake to hold it in place.

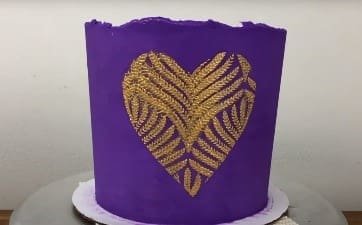
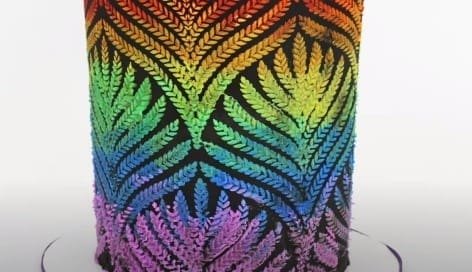
This way you'll avoid leaving finger indents in the frosting. Okay! The first and most obvious way to use a stencil is to cover the whole cake

STENCIL THE ENTIRE CAKE

With it. Attach the stencil to the cake by pressing or pinning it into the frosting and then spread a thin layer of buttercream over the top, going right up to the edges of the design. You can scrape off the excess buttercream with your offset spatula or I find it easier with a frosting smoother. Scraping off the excess buttercream ensures a level design instead of a bumpy one. Peel the stencil off and voila! The first section is done!. To continue the design around the whole cake you'll need to line up the stencil beside this first section. You should chill the cake before doing this to set this section of the design and once it's set, after about 30 minutes in the fridge, line the stencil up so that it continues the design beside the first section.

The sides of your cake need to be really straight for this, otherwise the stencil will either warp so that it's not flat against the whole cake and the design will smudge because the stencil will move around where it isn't pressed tightly against the cake, or the stencil will slope up or down the cake so the distance between the bottom of the stencil and the bottom of the cake will change as you go around the cake. After lining the stencil up, repeat the process of spreading and scraping the buttercream and then peel off the stencil.You can touch up any smudges with a toothpick or your offset spatula and if you're going to add any details you can place them strategically to cover up any imperfections and I'll explain you some ways to do that later in this tutorial.

You'll have to chill each section of the design before placing the stencil over the top of the edge to apply the design to the next section of the cake. To divide a stencil between the


DIVIDE THE STENCIL BETWEEN THE TOP AND SIDES OF THE CAKE

Top and side of a cake, start with either the side or the top and line up the stencil to cover the area you want. Spread buttercream over it, scrape off any excess with your offset spatula or frosting smoother, and when you peel off the stencil, peel carefully so that you don't move the stencil and angle it as you peel so that it curves around to cover the top of the cake (or the side of the cake if you did the top first).

Apply the stencil design to the top of the cake next, spreading and then scraping. You can do this with a round cake - not just a square cake. I have full tutorials for most of the cakes in this tutorial and I've put the links for them in the video description  below. And here's what the cake looks like with the stencil divided between the top and the side! You don't have to use the whole stencil to create a design.


USE RANDOM PARTS OF THE STENCIL

You can spread buttercream over certain parts of the stencil like here, where I'm only spreading it on to about a quarter of this stencil. Follow the same technique of spreading and scraping before peeling and you can repeat this wherever you like on the cake and since the stencil doesn't need to line up over the edge of the previous section of this design, you don't need to chill the cake in between the applications but if buttercream goes underneath the stencil,you'll need to wash it before using it again so that you don't smudge the cake with that buttercream. To be more intentional about which parts of the stencil to use, you can block off the parts of the stencil you don't want to


USE CHOSEN PARTS OF THE STENCIL

use by taping parchment or wax paper onto the stencil to cover those parts up. This way, instead of spreading buttercream randomly over sections of the stencil you're creating your design in advance and then you can spread the buttercream over the whole stencil and only that chosen design (which isn't blocked off with paper) will transfer onto the cake. Sometimes it's effective


LAYER STENCILS

to layer a design by using a stencil several times over the same area, usually with different colors. After using the stencil on an area of the cake you can use it again immediately in another area or if you want the design to overlap the parts you've already stenciled you should chill the cake to set the previous stencil design before continuing with the stencil so that you don't smudge the previous design.

Here I'm using a bamboo stencil and I'm layering it to try to create some depth in the design so that it looks like there's a forest of bamboo rather than just a row of bamboo plants. I'm washing the stencil and then flipping it over to create a reverse of the design so that not all of the bamboo is identical. After finishing with my first colour I'm chilling the cake and then switching to another colour and after finishing with this colour I'll chill the cake again and then go back to my first colour for more even coverage over the cake.


CREATE A NEW PATTERN WITH A STENCIL

and where to apply them to create a new pattern to make a unique cake design. For this cake I'm only using the outer part of this mandala stencil and I'm using the same section all around the top and bottom edge of the cake to create this scalloped border. There's a trick to get right down to the bottom of the cake without cutting the stencil which is to do it upside first and reverse the cake


DOUBLE UP ON STENCILS

To create a design within a shape you'll need to make your own stencil on parchment paper and I'll explain you how to do this in the next stencil technique. Press this stencil against the frosting on a cake and then use another stencil on top, wrapping it tightly over the parchment stencil and pinning it in place. You can use the patterned stencil first with the parchment stencil over the top, it doesn't matter which way around you do it. Then spread, scrape, and peel to reveal a unique patterned shape!


HOMEMADE STENCILS

To make your own stencil, use a piece of parchment or wax paper to trace over an image that you printed or drawn. If you're confident you can also draw directly onto the parchment or wax paper. I like to use edible markers for this but you can use a pencil instead if you prefer. Then cut that image out of the parchment or wax paper, leaving the paper outside the outline of the shape intact to use as your stencil. Press it against your cake and it will stay in place quite easily because it's so lightweight and any condensation on the cake will help secure it. If you want to you can attach it with pins. Now spread buttercream over the shape you've cut out. It's important to spread from the outside of the shape towards the middle of the shape because if you spread the other way, from the middle of the shape towards the paper around it, you might push buttercream underneath the stencil and that will go outside the outline of the shape on the stencil.

These homemade stencils aren't the best but they're very cheap and easy to make and you can use whatever image you like for them. You can do any touch-ups immediately after peeling off the parchment paper, while the buttercream within the stencil is still sticky, using a toothpick or an offset spatula.


STENCIL STRIPES

Block off two stripes with parchment paper to leave an isolated stripe exposed in between them and place a stencil over the top and spread buttercream over that. The buttercream will only transfer onto the stripe in the middle, the one without  parchment paper covering it, so when you peel the stencil and parchment paper off the cake you'll leave a stencil design on just that one stripe. You can repeat this for alternating stripes all the way around the cake.


BLENDED, OMBRE AND RAINBOW STENCILS

colour for a stencil or you can blend colours together as you spread the buttercream over the stencil or even spread the colours in a specific order like this rainbow stencil design on this cake.


INCORPORATE OTHER MATERIALS

You can fill in parts of your stencil design with other materials, not just buttercream. For example for this cake, as I'm peeling the stencil off you can see that there are some areas where the buttercream didn't stick to the cake so instead of trying to reapply the same stencil, I'm filling those parts in with sprinkles to add some dimension to the design. For this cake I'm adding piped flowers and for the next few techniques I'll explain you different ways to use materials other than buttercream with your stencil. For shimmery metallic


USE LUSTER DUSTS

Designs, use a brush to apply luster dust to a cake, brushing it over the stencil. Use a good quality luster dust for the boldest results. You might find that some of the dust falls down onto the cake board and you can wipe that off with a paper towel. Piping gel works well with stencils, too. Mix half a teaspoon of


USE PIPING GEL

Metallic luster dust with one teaspoon of vodka to make a paint and then add 1 tablespoon of clear piping gel, stirring just until everything's mixed together. If you over-mix you'll take away the metallic sheen. You really don't need a lot of this, just enough to cover the stencil with a thin layer. Spread it onto the stencil, scrape off the excess and then peel the stencil off and voila!

USE EDIBLE PAINT

To make edible paints to use on stencils, mix metallic luster dust with a drop of vodka to make a thick liquid with almost a paste-like consistency. Add vodka a drop at a time to get the right consistency and if you add too much, either add more powder or wait for the vodka to evaporate and for the paint to thicken before using it. Apply the paint to a stencil by brushing it on with a paint brush or dabbing it on with a sponge. The thicker the paint, the more opaque the color will be so if you add too much vodka the paint will be thin and the design won't be as bold. The higher the alcohol content of the vodka,the more metallic the paint will be.

USE STENCILS ON CHOCOLATE

To create stunning cake toppers with stencils, melt chocolate at 50% power in the microwave so that it doesn't seize and spread it onto parchment or wax paper. Leave it to set or put it in the fridge to speed up the process and then place a stencil on top of the chocolate and spread on more melted chocolate to apply the stencil design. Peel the stencil off immediately, leave the chocolate to set again, and then you can brush it with a metallic luster dust using a large powder brush. When you put the toppers on your cake, use gloves so that your fingers don't wipe to the powder off the chocolate. I hope I've given you some ideas and inspiration with these techniques to jazz up your stencil designs. If you use

Leave a Reply